Wood signs are beautiful touches for weddings, events, and home decor. Buying a sign on etsy or at retail can be pricey when you’re planning a wedding or buying a new house, so I am providing you all the materials and steps to make your own!
Step 1: Gather your materials & start staining.
- Birchwood (for a wedding sign I would get 24 x 36)
- Sandpaper/Sanding Block
- Wood Stain (I prefer Varathane)
- Pencils (not mechanical)
- White Chalk (smaller the better)
- Tape (masking or clear)
- Oil based paint markers
- Rag/Small Towel
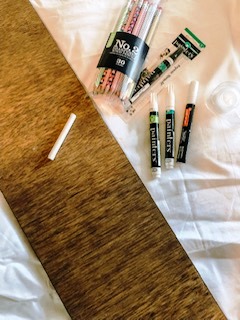
I find it is easier to work on birch wood. Birch-wood is not often sold at your local craft store so I actually go to Home Depot and find a large piece and have it cut into multiple sizes so you end up getting many sign sizes. Birchwood takes to the stains better than the wood they have at the craft stores. After you have your wood, you will want to get sand paper or a sandpaper block, which ever you prefer. I always use either a 100 grit or 220. Here is an example of what you can use. Always sand with the grain so you do not split the wood at the ends. When you have sanded your wood grab a rag you can throw away and dip it into the stain. Rags are 1,000 times easier to stain with than brushes. The stains I prefer are these, after I have stained I generally like to let it dry over night but worst case, give it a few hours. I always am mindful of what the sign will be used for. If I plan to put wall hangers on the back, I will not stain the back of the sign just so I do not risk it ever getting on my walls. Wedding signs, I always stain both sides because generally these are on an easel and you do not want people to see your marks on the back. For this DIY example I used Varathane Wood Stain in Special Walnut.
Step 2: Design, Print, & Chalk
This is where the fun begins, designing! I use word and create my phrase or design, make it the size I want, and I always make it a little light grey when I print because I find it easier to see my trace lines with the pencil which we will get to in later steps. (Always make your design the size you plan to have it on your project. This may mean some letters not fitting on the same page…do not worry, you can always cut and tape them together)

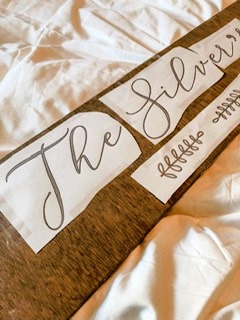
Once you have printed your design, you will want to turn the design over and begin coloring over the wording or the design with white chalk. It is important to make sure you try to only chalk the design or wording so that it comes off neat on the wood. Example below.
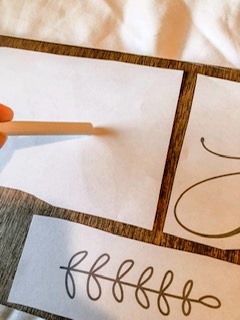
Once you have traced over all of your design or wording, flip it over and position on the wood how you want it to transfer. This is where the tape is crucial, tape the paper to the wood securely enough that it will not shift.
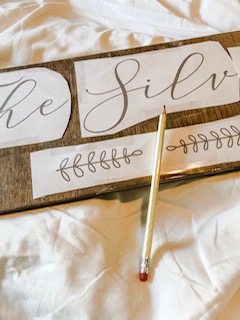
Step 3: Pencil Tracing
Now your design should be chalk side down on the wood, and your design and wording should be face up and secured onto the wood. Now you will trace the OUTLINE only of the letters or design. Do not color in the lines, it will make it more difficult later on. Trace the design so you can color in with the oil paint markers later.
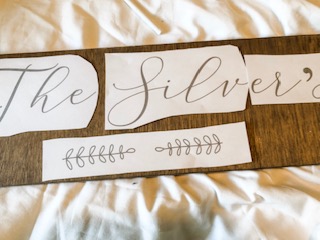
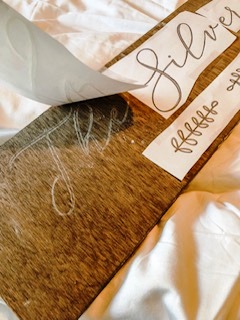
Step 4: Remove paper and WAHLA, your design has transferred!
This is what it should look like when you have completely traced with pencil the areas you chalked. Slowly remove the paper.
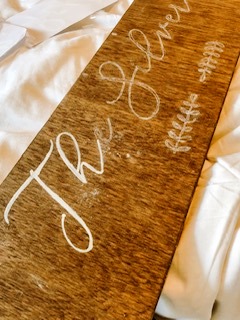
Now that you have removed the paper, your design should be easy to marker over and look like it was made by a professional. As you can see the chalk can get messy, so that is why it is very important to not chalk the whole paper, but just over the design. (The chalk we are able to easily clean off after we marker.)
Step 5: Paint Markers
This part is very important to be patient with, especially if you have never used your paint markers before. I recommend shaking them for a good five minutes before use and keeping a paper towel handy in case you get a gusher. It is important to not slam the tip against paper to get the paint to come out, because your tip will wear and then its not longer the way you want it for when you draw over the chalk. I like to trace over the chalk first but sometimes if the letters are large enough, I just fill as I go. Now all you need to do is color in your design and you can do as many layers as you would like.
As you can see, I have not mentioned “chalk” markers. I am personally not a fan of them. I love the painters brand oil markers but I also have got some really great oil markers from target with their brand. Is all personal preference.
Step 6: When sign is dry, wipe with a wet paper towel. You’re done!
I prefer to wait a few hours before I wipe the excess chalk debris but it comes right off. If you plan to have your sign outside, you can use a simple spray paint clear waterproof sealant on your sign.

I hope this DIY helped, if there are any DIY’s you would like me to do, just leave me a comment below!!

Here was the sign I made for our wedding. 24 x 36 with the Dark Walnut Stain.
xoxo
The Silver Wife Style
